Creating Backgrounds with Stamped Images
Hey there, Altenew fans! Jen here to share with you three stamped backgrounds I created for some 6x8 layouts.
 Pattern 1
I wanted to show three different styles using three different stamp sets. The first stamped background is the most simple and straightforward. I used the Dot Art Stamp Set to create a scalloped pattern just by stamping with black ink on heavy white cardstock. Stamping with Altenew Permanent Black Crisp Ink gave me the option to add color later if I felt like it. I used 12x12 paper, even though I knew I was going to trim it down so I could have leftovers for cards or other projects.

My background ended up staying black and white and I added pops of color with my title and embellishments. Acetate circles from the Butterfly Acetate Die Cuts helped emphasize the curves of the pattern.

For my title, I used the Watercolor Brush Markers - Spring Garden Set to create some washes of color that sort of matched the acetate pieces. Then I cut them out with the Bold Alphabet Die Set and added some black splatters to tie it all together. Super simple!

Pattern 2
The next stamped background pattern ended up being my favorite! I love stamping on colored cardstock and thought I would design this paper to match with some photos I had from the Desert Botanical Gardens in Phoenix.

I used the Indoor Garden Stamp Set (one of my all-time faves!) to stamp the bases of my plants in black. When you are creating a pattern with three images, it works well to stamp two next to each other and then stamp the third one next to it to form a triangle. Then you can simply repeat! (I go over it in more detail in the video at the end of this post.)

I added some tone on tone color as well as some Enchanted Gold Pigment Ink to color my plants. Also, I decided to add some details with a white gel pen and I think the overall result looks great. I didn't want to cover up any of that gorgeous pattern, so I cut my title directly from the background (again using the Bold Alphabet Die Set), placed a sheet of white cardstock behind it, and popped up the letters. The subtle effect is awesome!

Because I wanted to let the stamped pattern shine, I decided to add my photos in a pocket page to the right side of the title page. I included a little bit of that lagoon colored cardstock for a cohesive look.
Pattern 3
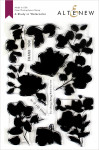
My final stamped background was created with the A Study in Watercolor Stamp Set. I started with plain white cardstock, again opting to fill an entire 12x12 page so I would have leftovers.

For this background, I chose five images and five colors. I stamped the images starting at the top left and working my way down, nestling the images together. I also made sure to spread out the colors evenly.

After I stamped, I added a bit of watercolor in a super light grey using my Altenew Watercolor 36 Pan Set. It's very subtle but adds some nice texture.

In order to feature a lot of the floral, I cut it into two pieces and put my journaling and title in between. I used the Tall Alpha Die Set to spell out the word "Sprinkles". So fun!
You can take a closer look at how I created these patterns in my video below or watch it in HD on Altenew's YouTube channel.
Here's another look at the patterns. I had so much fun creating these and can see myself sitting down to make a bunch more very soon!

Thanks for spending time with me today!
~SUPPLY LIST~
|