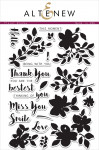
Stamp Focus: Wallpaper Art (feat. dies and mask stencil)
Hello, Altenew fans!
Today I'll be sharing 3 projects that I created to showcase the Wallpaper Art Stamp Set. What I love most about this set is that it comes with a coordinating die and a mask stencil! These two products make the crafting process so much easier.
I created a layout, a card, and a tag which I'm going to use as a bookmark. I also used some of the new ink colors and they are my new favorites!
 My layout took me the longest to create as there was a lot of blending, masking, and stamping to do.
 How to:
- Using the mask stencil, create a cluster of flowers using a blending tool. Start with the first flower shape. Once you have finished, use the mask stencil to mask the shape and add a second flower. You will be able to easily overlap the flowers.
- TIP: Add masking tape around the edges of your mask stencil to make sure not to get any ink on your background. You will also have a larger surface to blend on.
- Add details to your leaves and flowers with the Wallpaper Art Stamp Set. You can use black but I decided to go with the darkest shades of the ink colors I picked.
- Add embellishments, your photo, and a title. I had some extra leaves which I had stamped using the Floral Shadow Stamp Set and I added those for dimension and detail. An acetate butterfly from the Reflection Scrapbook Collection adds a bit of whimsy and also covers up a little flaw.

 For the title, I used a chipboard sticker from the Reflection Scrapbook Collection. I love how vibrant the colors are and how easy the whole process was even though it did take me a while to do.
 You can see how I created the layout in the video below or you can watch it in HD on YouTube:
For my card, I did some simple stamping on patterned paper. This is a simple technique and it's really quick. I picked two patterned papers from the new Live Your Dream Collection and stamped the outline with a dark ink shade which matched the color combination in the patterned paper.
 I added a blue strip of color to my card base. This is very simple to do.
HOW TO:
- Mask a diagonal strip using masking tape.
- Take different shades of blue from the new Lapis Lazuli Oval Set and blend them together over the strip.
- Pull away the masking tape and for extra detail, add some water splatters.
- Add elements to your card.
 The next project is a tag and it took 5 minutes to create! I picked one of the flowers from the set and heat-embossed it using Antique Gold Embossing Powder. I embossed the shape onto some patterned paper from the Live Your Dream Collection. I love the combination of gold and pink.

 Chipboard elements add detail and the doodled lines around the edges frame the flower. I decided to use a patterned paper for the tag's base. It is a subtle shade of pink and it's one of the patterned papers from the Live Your Dream Collection.
Thank you so much for stopping by. Have a wonderful day and HAPPY SCRAPPING.

~SUPPLY LIST~
|